 etworks
and Infrastructure VPN Serviceetworks
and Infrastructure VPN Service
etworks
and Infrastructure VPN Serviceetworks
and Infrastructure VPN Service
NOTE: Before installing the Cisco AnyConnect VPN Client you will need Admin rights to your machine. You may have to arrange this through your relevant local IT support.
The installation and start-up of the Cisco AnyConnect Client should be an automated process when using either ActiveX or Java via the web VPN gateway. However in some instances you may be asked to download the client software and install it manually. If you have earlier version of the Cisco AnyConnect Client already installed when you connect via the web, it will be automatically updated to the current version.
Point your browser to https://vpn.shu.ac.uk which will display the login box below.
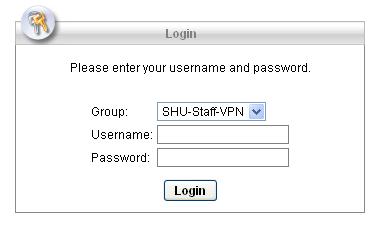
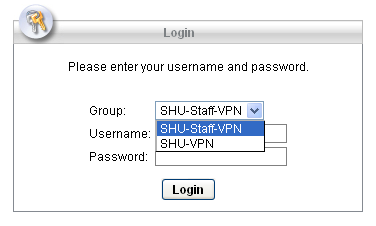
Choose
the correct group from the dropdown menu. For SHU staff use,
please choose the SHU-Staff-VPN
group and login using your normal SHU staff
credentials. For users with assigned separate credentials, please
choose the SHU-VPN group
and login with the usercode and password given to you.
Enter
your usercode and password and click on the Login button.
After a short while the Cisco AnyConnect VPN Client should start to download and install automatically.
Once the client has installed, you will see the screen below, advising you that you have successfully installed the client with the icon that will appear in the bottom right hand tray or on the menu bar.
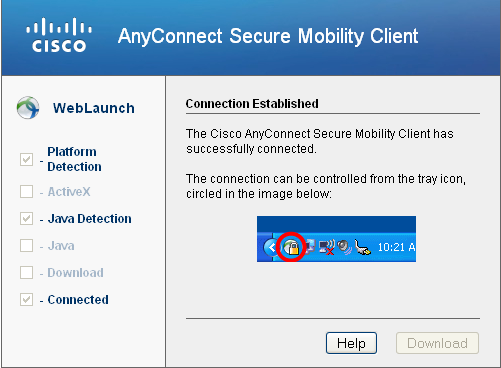
To connect again in future, you open the Cisco AnyConnect Secure Mobility Client from your programs.